
If you are using the Axis Pay UPI application then today we will guide you step by step on how to find and approve IPO Mandate request on the Axis Pay app. Before that let me tell you what is the meaning of IPO mandate.
Table of Contents
What is The Meaning of the IPO UPI Mandate?
By approving an IPO UPI Mandate, you authorize the automatic debit of funds from your bank account upon the successful allocation of shares in the offered IPO. When you get an IPO allotment, the IPO amount will be automatically debited from your account.
You can use any UPI application to approve your UPI mandate. Just create a mandate using your UPI ID and then login to the UPI application and approve or accept the mandate request. Read also: How To Transfer Money using IMPS on Axis Bank Mobile
How To Approve IPO UPI Mandate on Axis Pay Application
Axis Pay is a UPI application offered by Axis Bank. Any Bank account holder (Axis or other Bank) can create an account, link a Bank account and create a UPI account on the Axis Pay App.
To approve the IPO Mandate on Axis Pay, first, you need to install the application and create your UPI account by linking your bank account, and creating your UPI ID and UPI PIN.
Once you have created your UPI account on Axis Pay, now you can apply for an IPO and create a UPI mandate using your Axis Pay UPI ID and then approve the IPO Mandate from Axis Pay.
Hope you have created your UPI account on the Axis Pay UPI application, now follow these steps and apply for IPO and approve the mandate. Read also: How to Link Aadhaara with Axis Bank account online
1. Apply for IPO & Create UPI Mandate
Open your Demat account app and log in. I’ll demonstrate using Zerodha, but the process is similar across most Demat account apps.
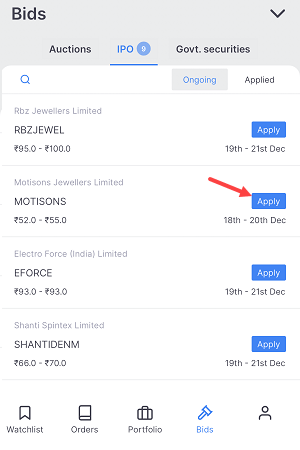
Step 1: Open your Demat application, go to the “IPO” section and choose your IPO to apply.
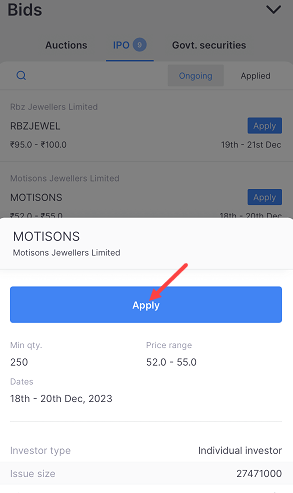
Step 2: Once you have selected your IPO, tap on the Apply button to create a UPI Mandate.
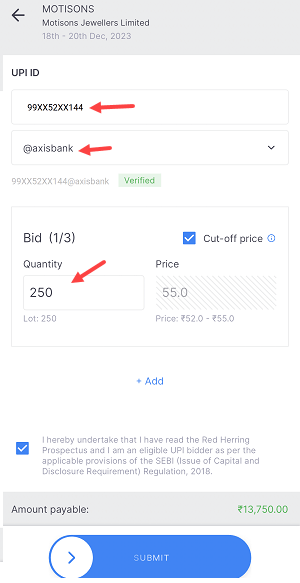
Step 3: On the next screen you will be asked to enter your UPI ID. Enter your Axis Pay UPI ID, enter your lot and click on Apply to place your request.
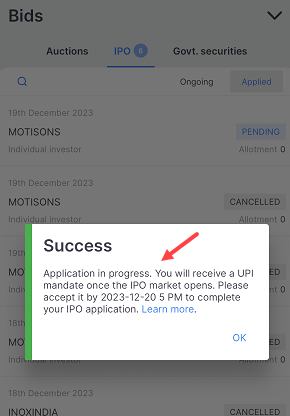
Step 4: Done! your IPO order has been placed successfully and a UPI mandate created. Now you need to login to the Axis Pay application and approve the mandate for auto debit.
2. Approve the IPO UPI Mandate on Axis Pay App
To check your IPO Mandate request and approve it on Axis Pay app, please follow these steps:
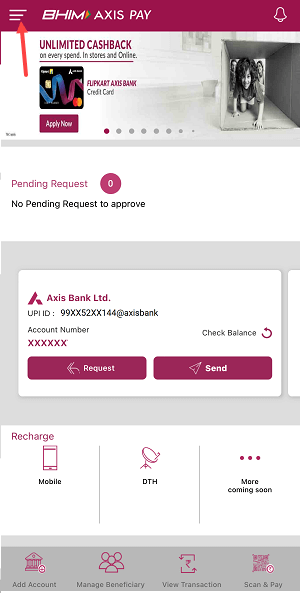
Step 1: You need to wait for a few minutes to receive a mandate request on the Axis Pay App. Login to Axis Pay and open the menu options as you can see in the below screenshot.
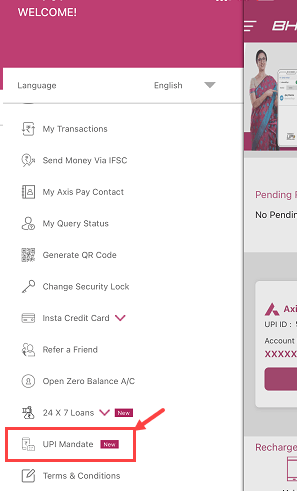
Step 2: In the Menu options, you can see the “UPI Mandate” option, just click and proceed.
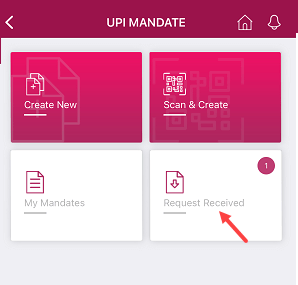
Step 3: Next screen you need to open the “Request Received” tab as you can see below screenshot image.
Step 4: Now you can see your UPI Mandate Request. Hit the “Accept” button to approve the request.
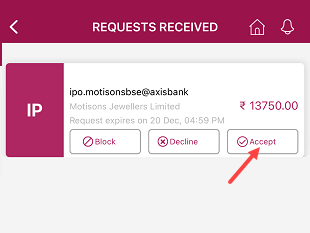
Once you approve the IPO UPI mandate request, the amount will be blocked in your bank account. Once you get an IPO allotment, the money will be debited from your bank account automatically.
No need to worry if you don’t receive an IPO allotment. Your blocked amount will automatically be unblocked within 10 working days, and you’ll have full access to your funds again. Read also: Check Axis Bank Debit Card Details online on Mobile
Final Words
Hope this helps you to approve the IPO UPI Mandate request on the Axis Pay application. Any Bank account holder (Axis Bank or Other Bank) can use the Axis Pay application to accept the mandate request.
Make sure you have created your UPI account on Axis Pay before applying for IPO and creating a Mandate request.