
Do you want to add a beneficiary bank account on the YONO SBI App? If yes then today we will tell you the step-by-step process.
YONO SBI is one of the best digital banking platform for SBI customers to manage their bank accounts from their mobile phones and access many online banking services directly on the phone.
You can transfer money, view your account balance and statement, order a new chequebook, manage your debit cards and credit cards and many more services accessible on YONO SBI. Read also: How To apply for Virtual Debit Card on YONO SBI
Table of Contents
Why you need to Add Beneficiary on YONO SBI
For IMPS money transfer on the YONO SBI application, first, you need to register a beneficiary bank account on the YONO App. Once you add the beneficiary account, it will be activated after 4 hours and then you can send money to his/her account via IMPS.
You can transfer up to 5 lac per transaction with the IMPS payment method so for security purposes you need to add the beneficiary account first.
Add Beneficiary Account on YONO SBI App
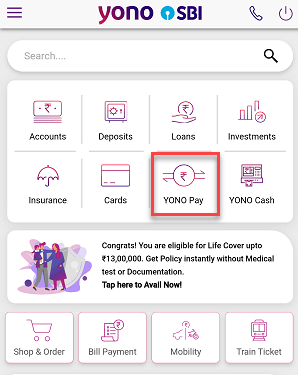
Step 1: Login to the YONO SBI Application with your MPIN and on the home screen, Tap on the “YONO Pay” option as you can see in the below screenshot.
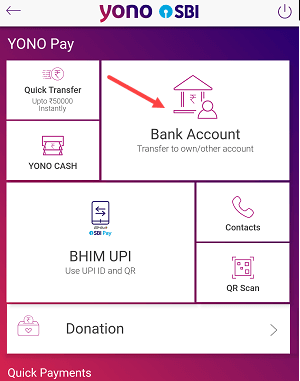
Step 2: Next screen on the YONO Pay section, tap on the “Bank Account (transfer to own/other account)” option and proceed.
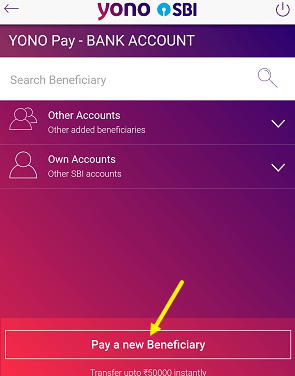
Step 3: Now you need to select the “Pay a New Beneficiary” option to add a new beneficiary bank account.
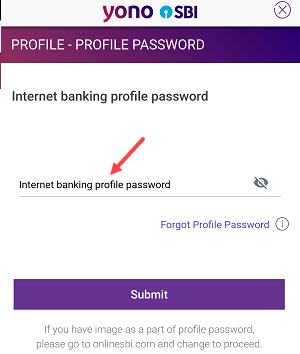
Step 4: Type your profile password to proceed.
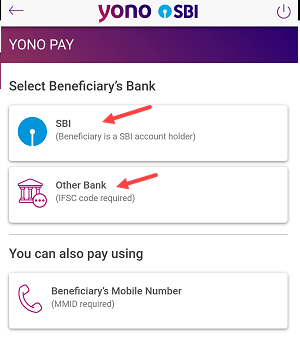
Step 5: Next screen if the beneficiary has an SBI account then select the “SBI” option and if the beneficiary has other bank accounts then choose the “Other Bank” option.
Step 6: Next screen on the beneficiary registration screen, enter the beneficiary name, account number, and IFSC code, set the maximum limit for this beneficiary, set nickname and click on the next.

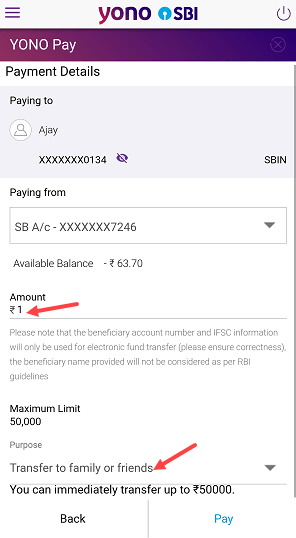
Step 7: Next screen enter ₹1 amount as we are just adding a beneficiary, select the purpose for transfer and click on Pay. (If you want to transfer money right now, you can add up to 50,000 amount here instead of ₹1)
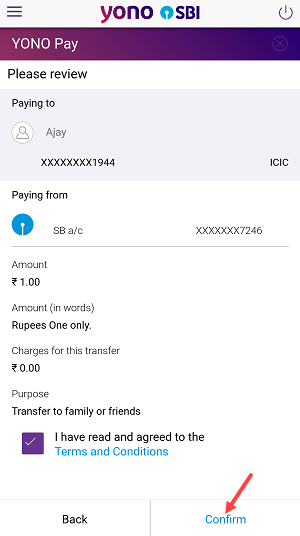
Step 8: Now review your payment and tap on the confirm to add this beneficiary.
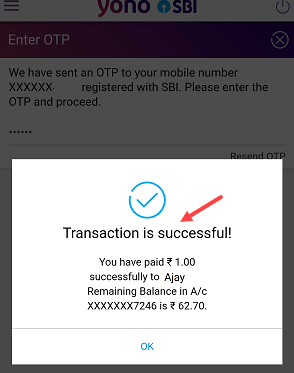
Step 9: You need to authenticate the transaction with the OTP sent to your registered mobile number. Once you submit the OTP, the amount will be transferred to the beneficiary account and the beneficiary will be added to your YONO SBI app.
Great! You have successfully added and registered a beneficiary on the YONO SBI App. Please wait for 4 hours to activate the beneficiary account. You can’t transfer money now.
If you need to transfer money urgently and don’t want to wait 4 hours for beneficiary activation, you can try the Quick Transfer facility on YONO and transfer up to ₹50,000 through IMPS instantly.
How To View and Edit/Delete New Added Beneficiary on YONO SBI
After 4 hours your added beneficiary will be activated and you can now transfer money to his/her bank account from your SBI account on the YONO SBI App.
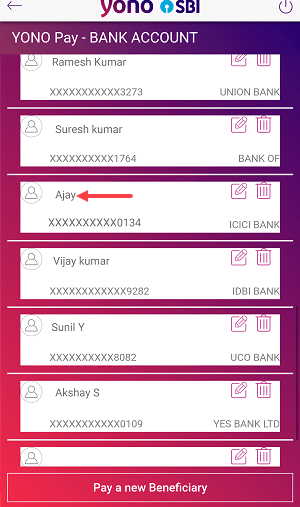
- To view or edit/delete your added new beneficiary on the YONO SBI App, just go to the “YONO Pay” section.
- Now choose the “Bank Account (transfer to own/other accounts)” option”
- Next screen select the “Other Accounts” option.
- Here you can view your added beneficiaries and transfer money. To edit the beneficiary details, just tap on the “Edit” button and to delete, just tap on the Delete button.
Once your newly added beneficiary is activated, you can transfer up to 5 lac from your bank account to the beneficiary account through IMPS. Hope this step-by-step guide on how to add a beneficiary account on YONO SBI will help you.